Skip to content
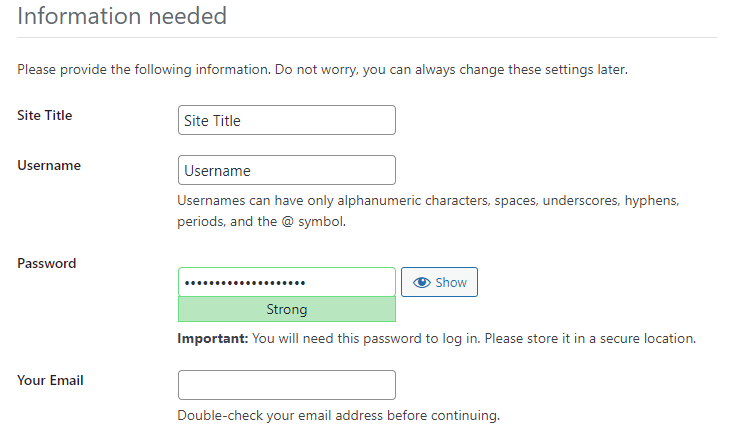
If you’re suddenly seeing the WordPress installation page even though you’ve already installed WordPress, it can feel confusing and frustrating. You might ask yourself, “Why is the WordPress installation page showing while it is already installed?”—a very common issue that can stem from a few underlying problems. In most cases, it’s related to database misconfigurations, especially the incorrect database prefix. But don’t worry; you’re not alone, and the fix is usually straightforward once you understand what’s going on.
In this article, we’ll walk through the reasons why WordPress may prompt you to install again, even when everything appears to have been set up already. Whether you’re managing a new website or troubleshooting a client’s WordPress setup, this comprehensive guide will help you find and resolve the problem efficiently.
Why is the WordPress Installation Page Showing? While It is Already Installed
When WordPress displays the installation page again, it’s trying to tell you that something critical is missing or incorrect—usually related to the database. Let’s explore the causes and solutions.
1. Incorrect Database Table Prefix (Most Common Reason)
The most common culprit behind WordPress showing the installation page again is an incorrect or missing table prefix in the wp-config.php file.
What Is a Table Prefix?
WordPress stores all its data in a MySQL database. Within that database, every WordPress installation has a set of tables like wp_posts, wp_users, wp_options, etc. The “wp_” part is the table prefix. You can customize this during installation (like changing it to blog_ for security reasons).
How It Affects Your Site
If your wp-config.php file contains the wrong prefix—for example, it expects wp_ but your database tables use blog_—WordPress won’t recognize the existing installation. Instead, it assumes you’re starting from scratch and displays the install page.
How to Fix It
-
Open your
wp-config.phpfile via FTP or File Manager. -
Locate this line: $table_prefix = ‘wp_’;
-
Check your actual database tables (via phpMyAdmin or your hosting control panel) to see what prefix they’re using.
-
Update the
$table_prefixline to match your existing table prefix. -
Example: If your tables are named
blog_posts,blog_users, etc., update the line to: $table_prefix = ‘blog_’;
This small change usually resolves the issue instantly.
2. Incorrect Database Credentials
After fixing the table prefix, if the issue still persists, your next step should be checking the WordPress database credentials in the wp-config.php file. These credentials must match what your hosting provider has configured for your database.
Here’s what you need to verify:
-
Database Name (
DB_NAME) -
Database Username (
DB_USER) -
Database Password (
DB_PASSWORD) -
Database Host (
DB_HOST)
How to Check and Update Credentials
Open your wp-config.php file and look for these lines:
define('DB_NAME', 'your_database_name');
define('DB_USER', 'your_database_user');
define('DB_PASSWORD', 'your_database_password');
define('DB_HOST', 'localhost'); // sometimes it could be something else like '127.0.0.1' or a remote host
You can cross-check these credentials by logging into phpMyAdmin or asking your hosting provider.
Tip: If you’re not sure about your DB_HOST value, check with your web host. Some managed hosting environments use a custom hostname (e.g., mysql.yourhost.com).
3. User Permissions on the Database
Even if your credentials are correct, WordPress may not be able to connect properly if the database user lacks the right permissions.
What Permissions Are Required?
Your WordPress database user should have at least the following permissions:
-
SELECT
-
INSERT
-
UPDATE
-
DELETE
-
CREATE
-
ALTER
-
DROP (optional, but sometimes required for plugins)
How to Grant Permissions
If you’re using cPanel, here’s how to assign permissions:
-
Go to MySQL Databases.
-
Scroll down to “Add User To Database”.
-
Select your user and database.
-
Click Add, then choose All Privileges.
If you’re using a VPS or SSH-based setup, you can run a SQL command:
GRANT ALL PRIVILEGES ON your_database_name.* TO 'your_database_user'@'localhost';
FLUSH PRIVILEGES;
4. Corrupted or Missing wp-config.php File
Sometimes, your wp-config.php file may be partially deleted or misconfigured during migration or update.
What to Do
-
Reupload a backup of your
wp-config.phpfile if available. -
If not, you can create a new one manually using the WordPress official configuration documentation.
-
Make sure it has the correct database settings and prefix.
5. Missing or Deleted Database Tables
If for any reason your WordPress database tables are missing or deleted (accidentally or due to a failed migration), WordPress will naturally ask you to reinstall.
How to Check
-
Log into phpMyAdmin and select your WordPress database.
-
If no tables exist (or only a few do), you likely lost your database content.
-
You can restore from a backup if available.
Recommendation: Always back up your WordPress site regularly using plugins like UpdraftPlus or BlogVault.
6. Incorrect Database Selection in phpMyAdmin
It might sound obvious, but sometimes users have multiple databases on the same hosting account and might mistakenly check the wrong one. Ensure you’re editing the database that’s actually connected to your WordPress site.
7. DNS or Hosting Cache Issues
While rare, caching issues on the hosting or DNS side might cause the browser to display an outdated page. Try the following:
-
Clear your browser cache.
-
Use an incognito window.
-
Clear hosting-level cache (if you’re using platforms like SiteGround or Kinsta).
-
Flush DNS: Run
ipconfig /flushdnson Windows orsudo dscacheutil -flushcacheon macOS.
8. Corrupted .htaccess File
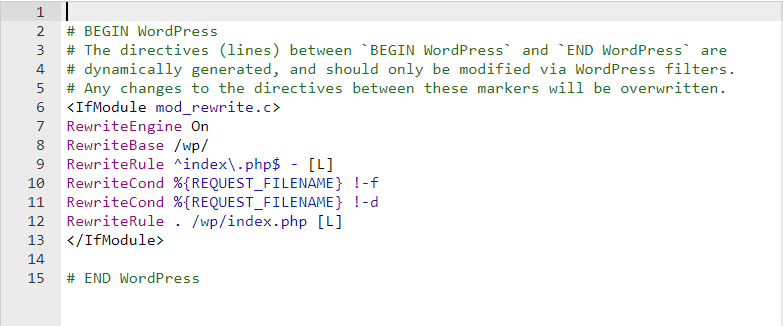
A corrupted .htaccess file can interfere with how WordPress handles requests.
How to Reset It
-
Rename the current
.htaccessto.htaccess_old. -
Login to your WordPress dashboard (if possible), go to Settings > Permalinks, and just click Save. This will generate a new
.htaccessfile automatically.